Rechargeable and waterproof
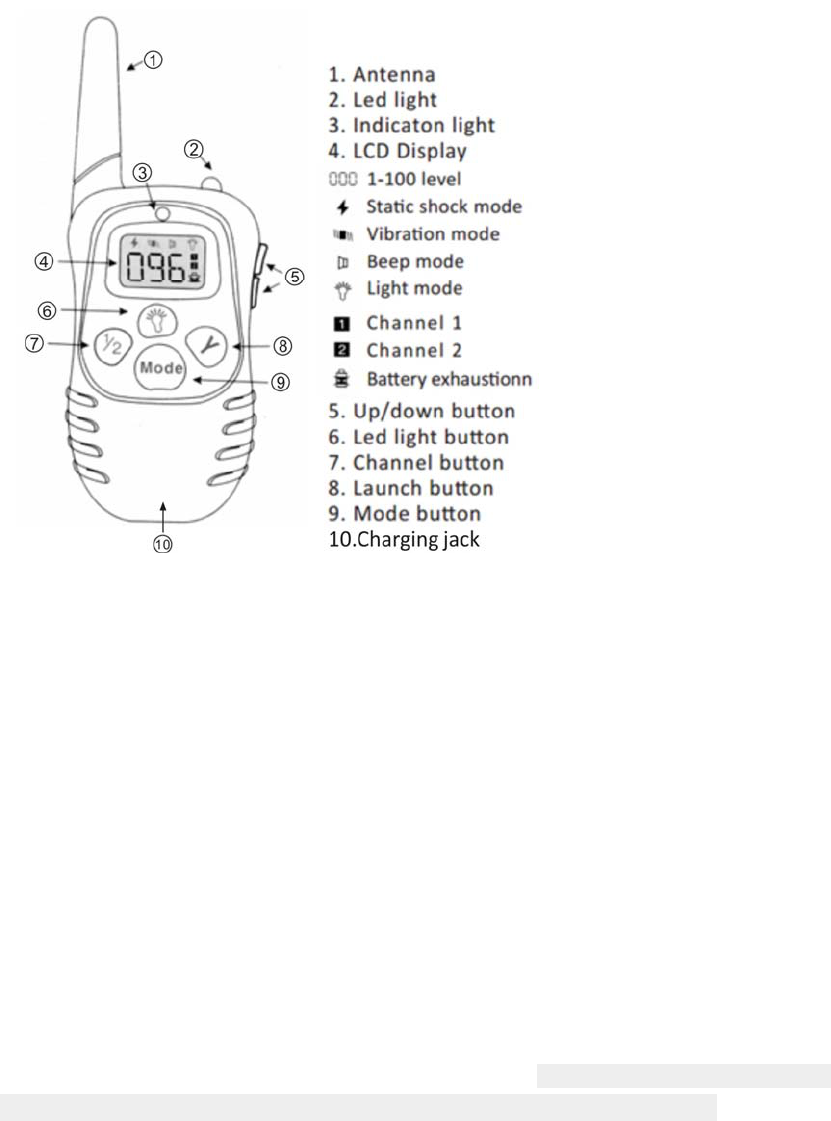
◎Controller
◎Features
1.100 levels of vibration.
2.100 levels of static(optional).
3.The levels can be altered by use of up & down button.
4.A tone button activates a tone on the receiver collar.
5.The system can be used for 1 or 2 receivers collar.
POWER SAVING
6.The Receiver Collar will TURN OFF if is unused for 4 minutes.
7.Any movement will activate the Receiver Collar into STANDBY MODE.
8.The Controller will go into STANDBY MODE if there is no operation after 20 seconds
and turn off after 2 minutes.
◎How to match
1. 1.Charge the Controller
Connect the charger connector to the charging jack. After plug the charger into a
standard outlet, The red LED light inside the Transmitter will be lighted. Charge the
Controller at least 6 hours for the first charge. After fully charged ,the red LED light will be
turned off automatically.
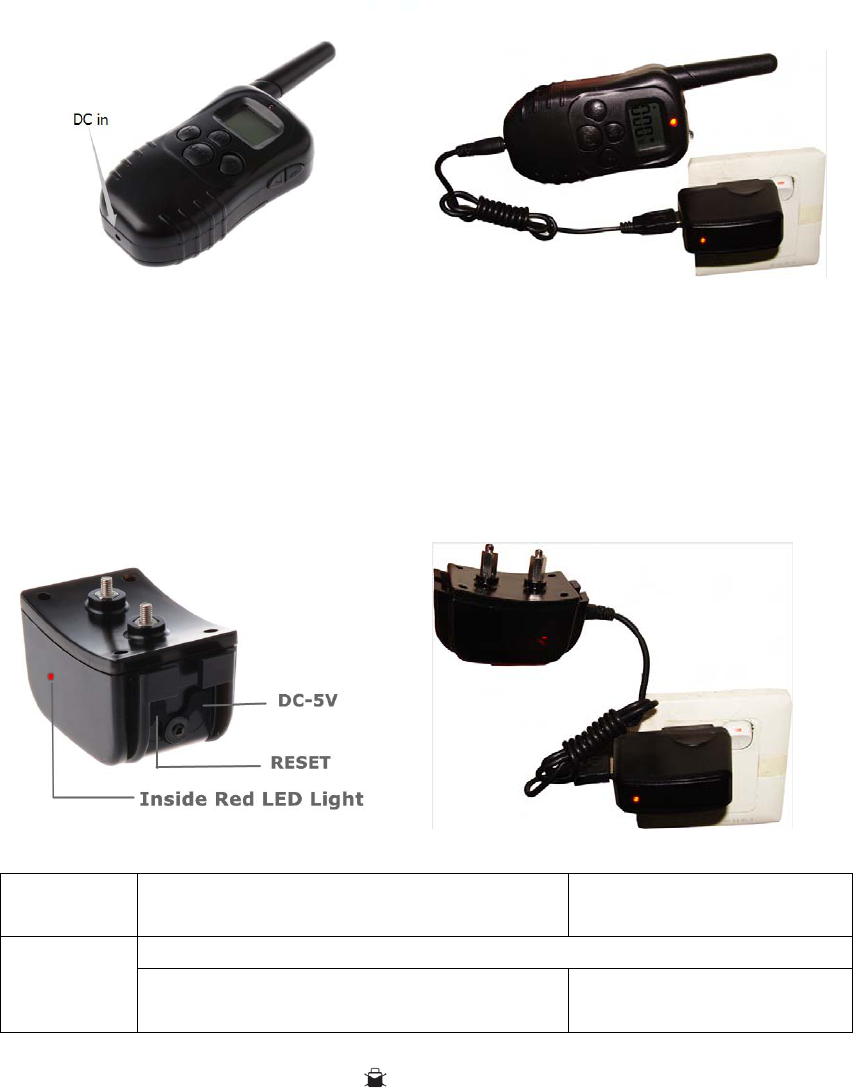
2. Charge the Receiver Collar
After Plug the charger into a standard outlet., the red LED light inside the Collar Receiver
will be lighted.
Charge the Collar Receiver at least 6 hours for the first charge. After fully charged ,the red
LED light will be turned off automatically.
Controller
Enters sleep mode after 2-3m of no
operation
Press Mode for 1s wake to
up
Receiver
Collar
Lights up once per 5s when working
Enters sleep mode after 20s no movement Apply any movement to
wake it up
Low battery indicator: the symbol
will show up on the right down side of LCD
screen.
◎Install the receiver’s contact column
According to the size of the dog and dog hair length, choose the right column for your dog
between the tall one and short one.
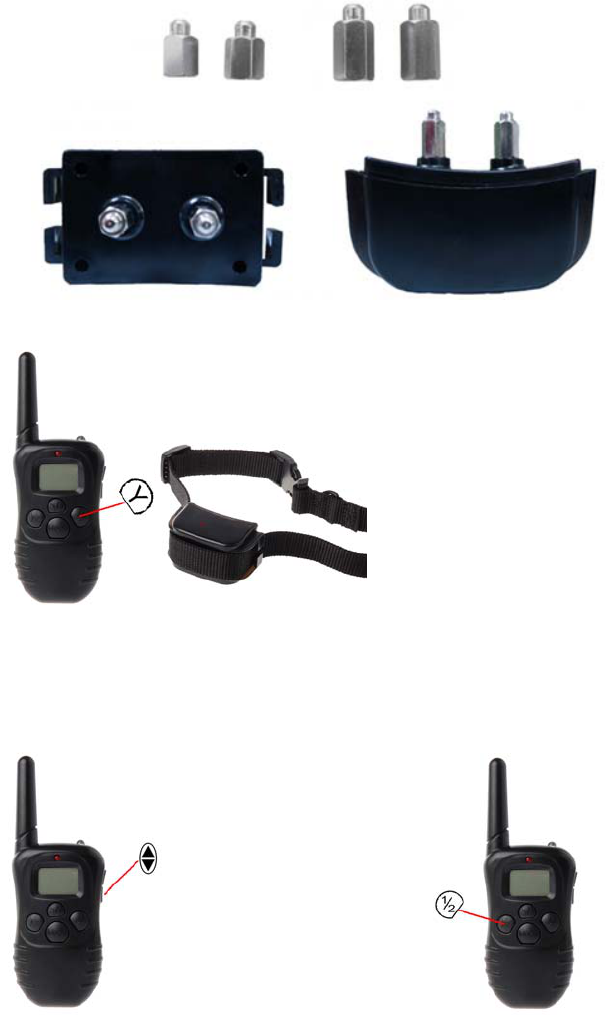
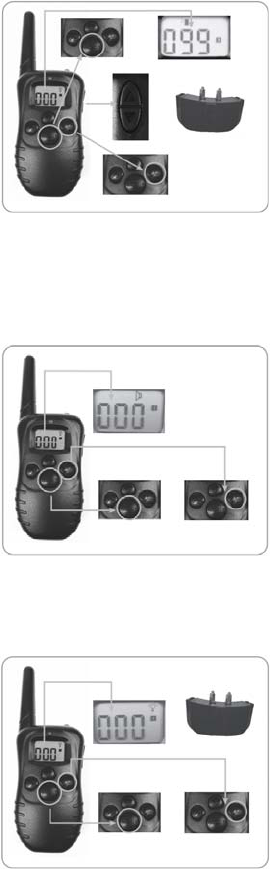
◎How to Use the controller.
●After install the batteries of receiver collar, you will hear a sound “beep”, now press Y
button of Controller within 5 seconds, you can hear a “beep” again that means paired
successfully. If not, please release the batteries of receiver collar and install them once
again, and try the above steps.
●Press the up and down buttons ●Choose the different channels for 1 or 2 on
right hand side to set level. Receivers collar.
Note: If you fail to press the Y button after hearing the second beep from the
Receiver collar, you need re-sync and start with pressing the Reset button of the receiver
collar.
●Press Y button, test bulb will flash, that means Shock function works, you can press
the UP/DOWN button to adjust the intensity level.
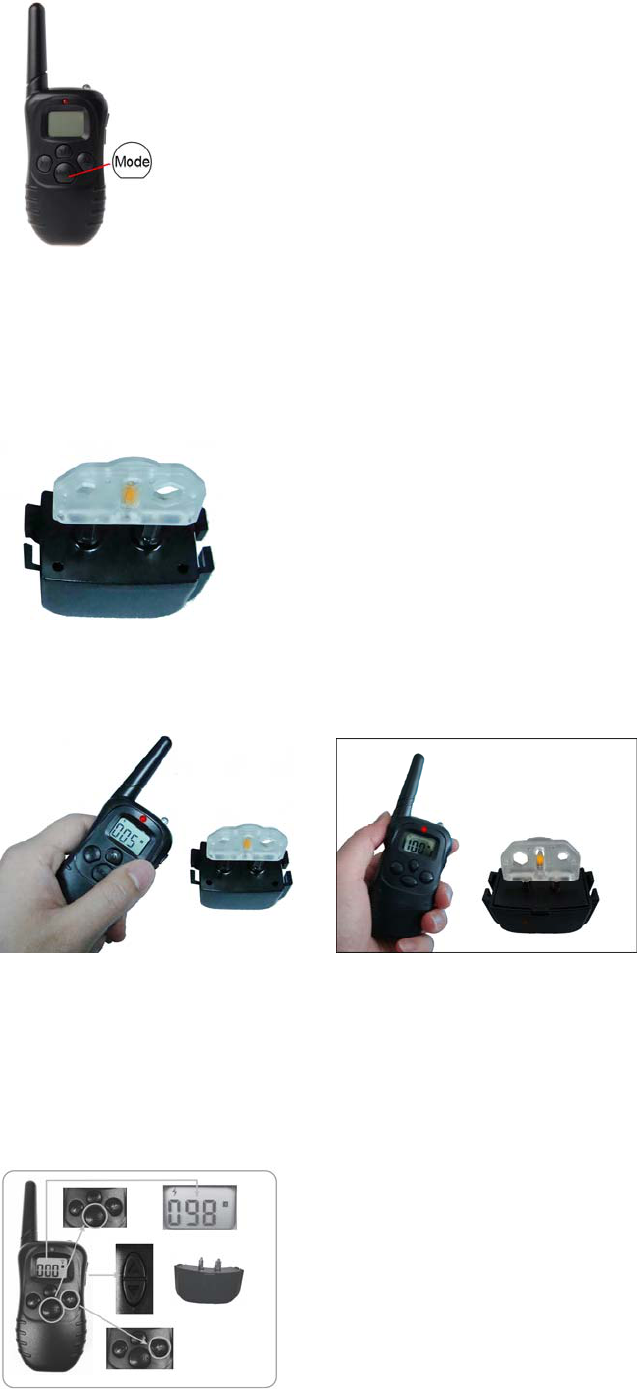
◎How to Test Static Shock Function (after encoding is completed)
1.Take out the test bulb from the package and put it on the Receiver collar’s contact
points.
2.Press Mode button of Remote transmitter, switch to Shock Mode, confirm LCD display
not to be 0, you can press UP/DOWN button on the right side to adjust.
3.Test the Training System
The following methods will help you ascertain whether this training system
functions properly. Please make sure that the remote and the receiver collar have
been synced successfully.
4.Test the static shock function
•Take out the test bulb from the package and wind its metal wire on the Receiver collar’s
contact points.
• Pressing the Mode button switch to Shock mode, confirm LCD display not to be 0 , and
then press the UP/DOWN button to adjust the intensity level.
• Press the Y button and the test bulb will flash, that means Shock function works.
5.Test the vibration function
•Press Mode button of controller, switch to Vibrate Mode, confirm LCD display not to be 0,
and then press the UP/DOWN button to adjust the intensity level.
•Press Y button, Receiver collar will vibrate, that means Vibration function works.
6.Test the beep function
•Press Mode button of Controller, switch to Beep Mode.
•Press the Y button and receive collar will beep, that mean Beep Function works.
7.Test the LED Light function
•Press Mode button of Controller, switch to Beep Mode.
•Press the Y button and then the receiver collar will flash, signifying that the LED Light
function works.
◎After indicating that the Controller has been synced successfully with the
receiver collar. To sync the remote with another receiver collar, simply repeat the
previous steps.
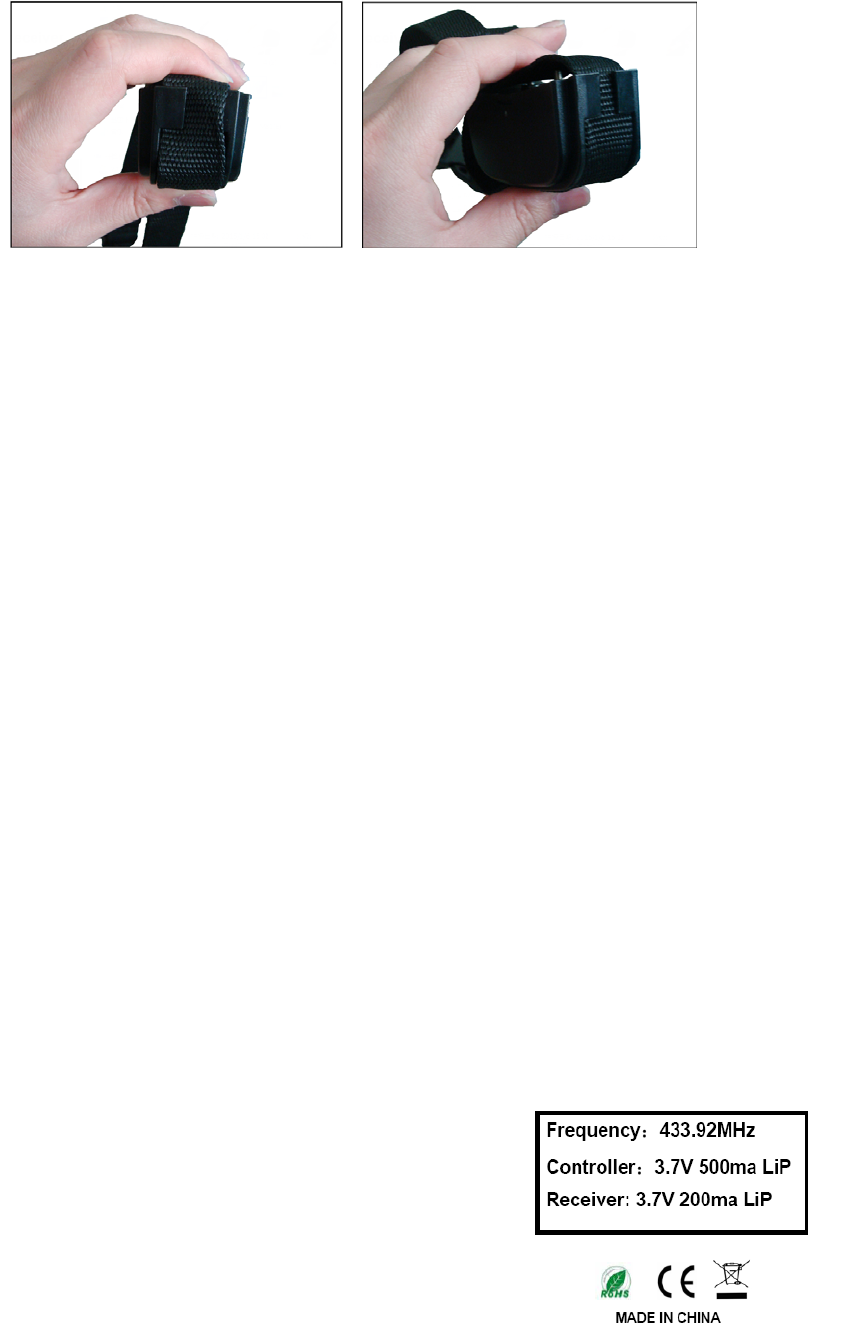
Thread the collar strap through the slots on the receiver.
◎Package includes
1 x Remote
1 x Receiver Collar(1 for 1)/ 2 x Receiver Collar(1 for 2)
1 x Controller
1 x Belt (1 for 1) / 2 x Belt (1 for 2)
1 x Test Bulb
Notes for use:
1.The lifetime of the batteries vary according as how often you use the
product. Therefore you should often check the batteries by hearing the beep
from the Receiver Collar and watching the indicator sign on the LCD screen of
the Transmitter.
2.The valid distance of Controller means the straight-line distance between the
Controller and the Receiver Collar without obstacles in between. If there are
interference signals or signal screening around, the actual remote Controller
distance may vary.
3.This product is for pet training. Only by training, the pet can understand the
intention of its owner. Good effect can only be achieved after a period of
training.
4.Training sessions should be kept positive and short, about 10-15 minutes
long each time.
5.Presently, this product is the most effective and safest tool for training
pet. Following the correct operational instructions, you can effectively train the
pet and bring it no harm.
§ 15.19 Labelling requirements.
This device complies with part 15 of the FCC Rules. Operation is subject to the
following two conditions: (1) This device may not cause harmful interference, and (2)
this device must accept any interference received, including interference that may
cause undesired operation.
§ 15.21 Information to user.
Any Changes or modifications not expressly approved by the party responsible for
compliance could void the user's authority to operate the equipment.
